
-
Section Workspace Overview
Video: Section workspace overview explains how you can create, organize, and edit your pages.
Section Highlights:
Access the Section Workspace for sections where you have Section Editor privileges. You can access the Section Workspace by selecting Site Manager from any website page.
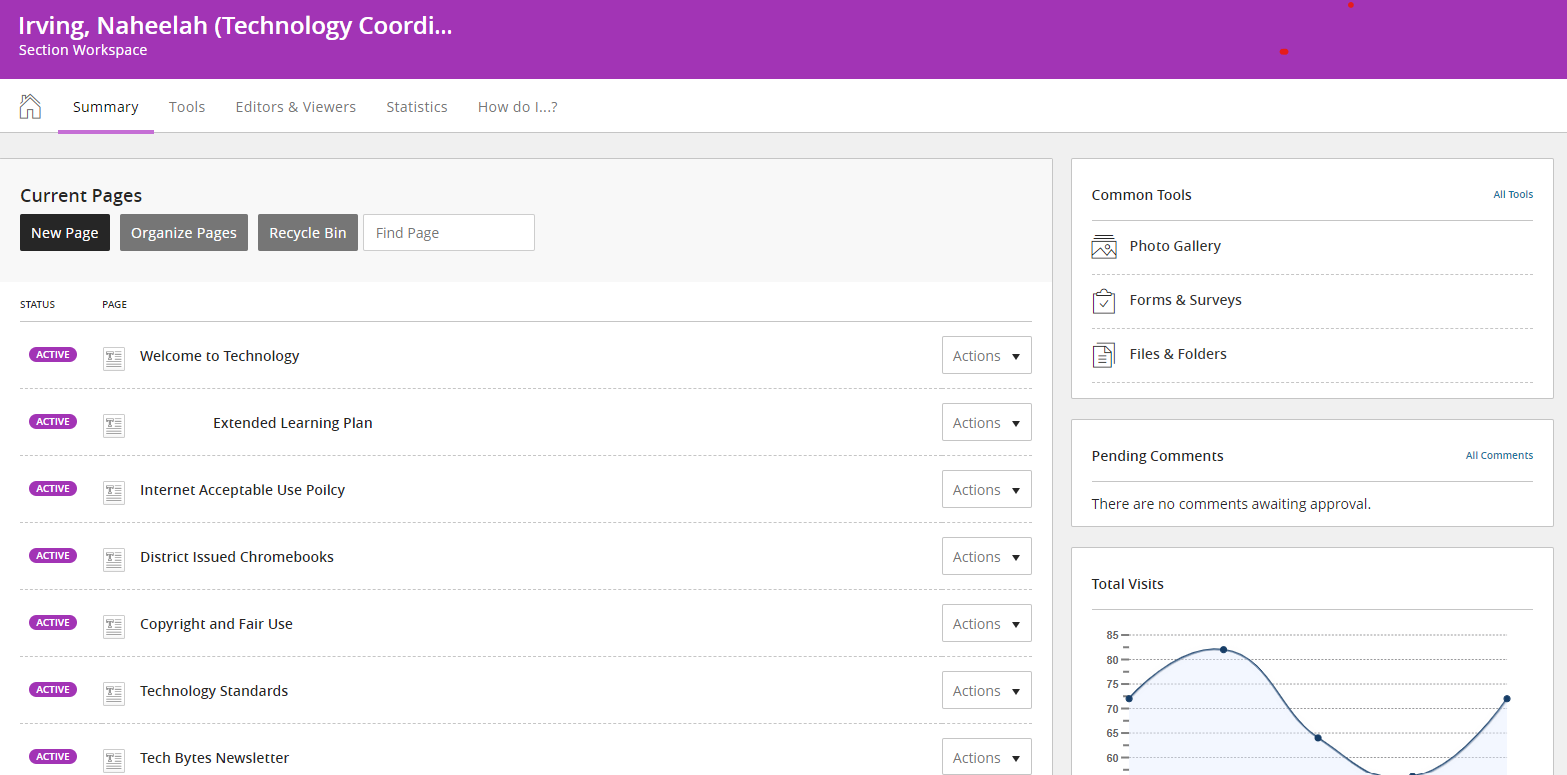
New Page allows you to create a new page.
The green status button next to a page signifies that the page is currently active. This button is a toggle switch that will toggle between active and inactive. By default, new pages are always active.
Selecting the Actions button next to a page allows you to edit the page, set page options, get a link to a page, copy the page, move the page, delete the page, or set viewers.Organizing Pages allows you to drag and drop your pages to change the order or to create a hierarchy.
The Recycle Bin stores pages that you've removed until you are ready to permanently delete them. The page search feature comes in handy if you have many pages in your section.
Current Pages block, Quick Links to Common Tools, and a snapshot of Total Visits
- In Common Tools, selecting all Tools takes you to the Tools tab.
Pending Comments This will allow you to approve, review, or decline comments.
- Under Pending comments, selecting All Comments opens the Approve Visitor Comments window, also found in the Tools tab.
You can also access tabs for Tools, Editors & Viewers, Membership, and Statistics.
- On the Tools tab, you can view your section tools and apps.
- On the Editors & Viewers tab, you can add users or groups who can edit your section or limit who can view it.
- On the Membership tab, you can select groups or specific users to receive messages from your section.
- On the statistics tab, you have access to the statistics for your section.
You can view your website and access the Help Center from the top toolbar.
Summary Tab
The Summary tab shows a list of current pages in your site. You can create new pages within a section and edit current pages by selecting the page name. You can organize the pages, search for a page, and view statistics for the page from the Summary tab.
Tools Tab
The Tools tab provides access to section tools and apps. You have access to options like App Manager, Files & Folders, Forms & Surveys and Reports. Use the Tools tab to approve Visitor Comments and Community Editing.
Editors & Viewers Tab
Use the Editors & Viewers tab to assign Section Editors and Viewers for each section. You can assign a group of users or an individual user editing and viewing rights for your section. By default, all visitors to your website can view your section. You can use the Viewers tab to limit who can view the section.
Membership tab
Use the Membership tab to add members to your section workspace. You can add groups or individual users and send a message to all section members.
Statistics Tab
The Statistics tab displays section statistics across a date range—Total Visits, Total Page Views, and Total Targeted Visits. If no date range is provided, the graph shows total visits to your section.
How do I Tab
Use the How do I...? tab to locate help resources for the current workspace. Use the links provided to navigate to relevant help pages.
Add Pages
Pages allow you to branch out your information for a cleaner, more logical flow. Use pages to split up your course information into smaller chunks. Creating pages makes managing and editing your course content simpler and faster.
Navigate to your section workspace and select New Page.
- Type a Page Name.
- Select the type of page you want to add from the template.
- Select Save & Continue to begin editing the new page or Save & Exit to return to the section workspace.
Edit and organize your pages
Choose how you want your pages to be arranged on your site and select different editing options for each page.
- Select Organize Pages to change the order in which pages appear. You can choose to organize them in alphabetical order or you can drag and drop pages into the order you want.
- Select Save.
- Select Recycle Bin to restore deleted content.
- Select Actions next to each page to expand the list of options for that page.
- Edit Page: Edit the content, layout, and apps on the page.
- Page Options: Edit the Page Name, Display Duration, and background Image, and hide or show the page.
- Get Link: Get a Full Web Address or a Relative Web Address that you can use to link this page from other locations on your site.
- Copy Page: Copy the page with its existing settings and content.
- Move Page: Move the page to another site, channel, or section. You can move pages between workspaces you can edit.
- Delete: Delete the page. A confirmation window appears to confirm the deletion.
- Set Viewers: Choose different groups or individual viewers for a page. The default is that all website visitors can view pages.
- Select Active next to each page to make the page active or inactive for your site.
Video tutorials
Working with Apps
Apps are the content building blocks of pages. You can design and organize your content, upload files, and add shortcuts, links, and photos.
Select a School...
Select a School
- Orange High School
- STEM Innovation Academy of the Oranges
- Orange Preparatory Academy of Inquiry and Innovation
- Central Elementary School
- Cleveland Street School
- Forest Street Community School
- Heywood Avenue School
- Lincoln Avenue School
- Oakwood Avenue Community School
- Park Avenue School
- Rosa Parks Community School
- Scholars Academy
- Orange Early Childhood Center
- John Robert Lewis Early Childhood Center
- Twilight Program